Chapter 1: Introduction to ESP Microcontroller
What is ESP?
ESP microcontrollers, developed by Espressif Systems, have become a popular choice in the world of IoT (Internet of Things) due to their low cost, integrated Wi-Fi capabilities, and ease of use. These microcontrollers are widely used in home automation, wearables, and other smart devices.


Key Features
Wi-Fi Connectivity: Built-in Wi-Fi enables easy network communication.
Low Power Consumption: Designed for energy efficiency, ideal for battery-powered applications.
Rich I/O Capabilities: Multiple GPIO pins, ADC, DAC, PWM, and more.
Support for Multiple Programming Languages: Compatible with Arduino IDE, MicroPython, and others.
Cost-Effective: Affordable for hobbyists and scalable for industrial use.
Popular ESP Models
ESP8266: Known for its simplicity and low cost.
ESP32: Offers more processing power, Bluetooth capability, and additional I/O options.
Chapter 2: Understanding Raspberry Pi Boards
ESP8266 Boards
ESP-01:
Description: A small, low-cost module ideal for simple IoT applications.
Specifications: 1MB flash memory, 2 GPIO pins.
Use Cases: Basic IoT projects, Wi-Fi-enabling other microcontrollers.
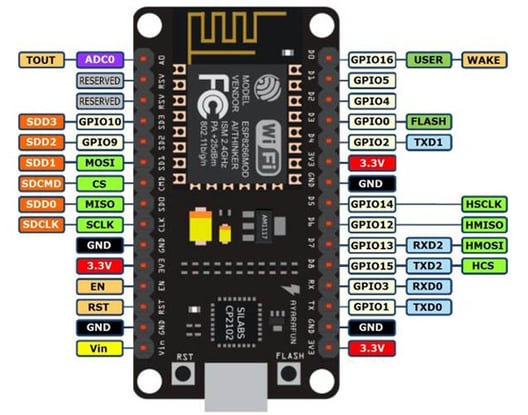
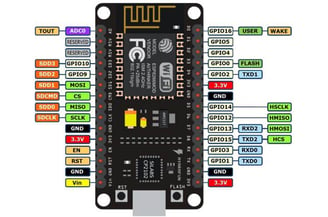
NodeMCU:
Description: A development board with an ESP8266 chip and integrated USB-to-serial converter.
Specifications: 4MB flash memory, 10 GPIO pins.
Use Cases: Prototyping, educational purposes, more complex IoT projects.
ESP32 Boards
ESP32 DevKitC:
Description: A versatile development board with an ESP32 chip.
Specifications: Dual-core processor, 520KB SRAM, multiple GPIOs, Bluetooth.
Use Cases: Advanced IoT applications, wearables, Bluetooth applications.
Wemos D1 Mini:
Description: A compact development board with an ESP32 chip, similar in size to the ESP-01.
Specifications: 4MB flash memory, multiple GPIOs.
Use Cases: Space-constrained projects, portable devices.
Chapter 3: Getting Started with Raspberry Pi
Setting Up the Development Environment
Installing Arduino IDE: Download and install from the official Arduino website.
Adding ESP Board Support: Add the ESP8266 or ESP32 board URL in the Arduino IDE preferences.
Installing Board Definitions: Go to Boards Manager and install the ESP8266 or ESP32 package.
Basic Connections
Power Supply: Connect the board to your computer via USB.
GPIO Pins: Use jumper wires to connect sensors, LEDs, and other components to the GPIO pins.
Uploading Your First Program
Select the Board: Choose the correct ESP board from the Tools menu.
Select the Port: Choose the correct COM port.
Write a Simple Program: For example, blink an LED.
Upload the Program: Click the upload button and observe the output.
Chapter 4: Understanding the Basics
GPIO Control
Digital Output: Turning an LED on and off.
Digital Input: Reading the state of a button.
Analog Input: Reading sensor values with the ADC.
Wi-Fi Connectivity
Connecting to a Network: Use the 'WiFi.begin()' function to connect to a Wi-Fi network.
Web Server: Create a simple web server to control devices via a web browser.
Deep Sleep Mode
Introduction: Save power by putting the ESP into deep sleep mode.
Implementation: Use the 'esp_deep_sleep_start()' function.
Chapter 5: Working with Pins
Pin Modes
Input: Reading data from sensors.
Output: Controlling LEDs, relays, and other actuators.
PWM: Controlling the brightness of LEDs and the speed of motors.
Interrupts
Introduction: Respond to events like button presses.
Implementation: Use the 'attachInterrupt()' function.
I2C and SPI Communication
I2C: Connecting multiple devices with just two wires.
SPI: High-speed communication with devices like displays and sensors.
Chapter 6: Troubleshooting
Common Issues
Failed Uploads: Check connections, select the correct board and port.
Wi-Fi Connection Problems: Verify SSID and password, check router settings.
Sensor Errors: Ensure proper wiring and code implementation.
Tips and Tricks
Use Serial Monitor: For debugging and monitoring outputs.
Regular Updates: Keep your Arduino IDE and board definitions up to date.
Community Support: Leverage forums and communities for help.